The coolest thing about embossing and debossing is that it’s completely exclusive to printed paper. You’ll never see a truly “embossed” imprint on a web image—but that makes it difficult when you want to show off your embossed print design on a computer screen.
In the following tutorial, we’ll show you how to use a simple Photoshop technique to create embossed and debossed effects that look so much like the real thing, nobody will be able to tell the difference.
We’ll be applying the embossed and debossed effects to one of our folder mockup templates, but you can use this technique with any design you like.
Creating an embossed effect
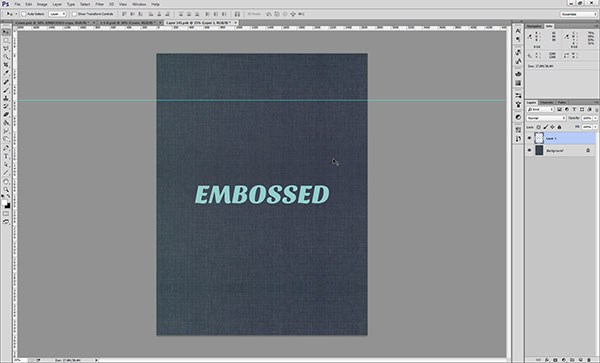
1. Open up your background texture image (in this case, a piece of textured paper) in Photoshop and create a new layer. Paste the logo, text or artwork that you want to emboss into the document using the “paste as pixels” option.
Pro tip: Use the CTRL+V shortcut to automatically paste as pixels.
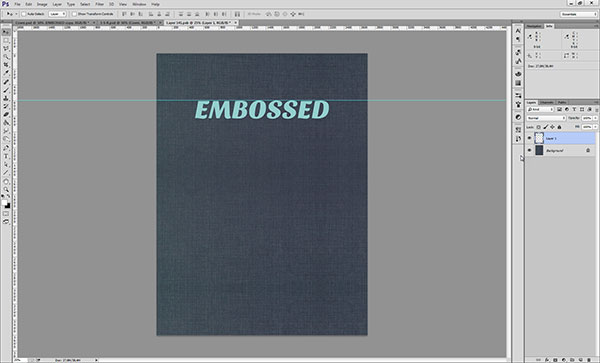
2. Ensure that your logo/text/etc. is in the correct position and is the right size for the design.
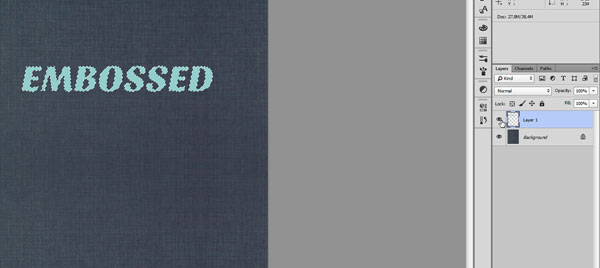
3. Select the pixels on this layer by right-clicking the layer’s thumbnail and clicking Select Pixels. Alternatively, you can hold the Ctrl button and left-click the layer thumbnail.
4. Click the Background layer and then Copy by pressing Ctrl+C. Create a new layer (Ctrl+Shift+Alt+N) and then paste the selection you copied into this new layer by hitting Ctrl+V. This will give you a copy of your logo that appears to be composed of the same material as your background.
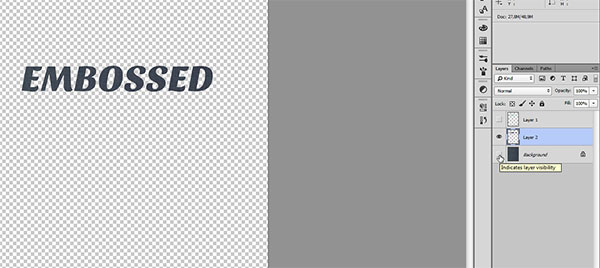
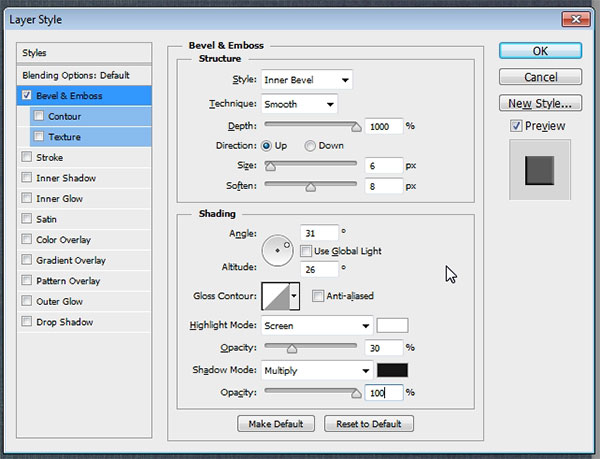
5. Double-click this new layer to bring up the “Layer Style” window. From here, select the “Bevel & Emboss” option to begin creating the beveled effect. Change the “Bevel & Emboss” settings so that they match the picture below.
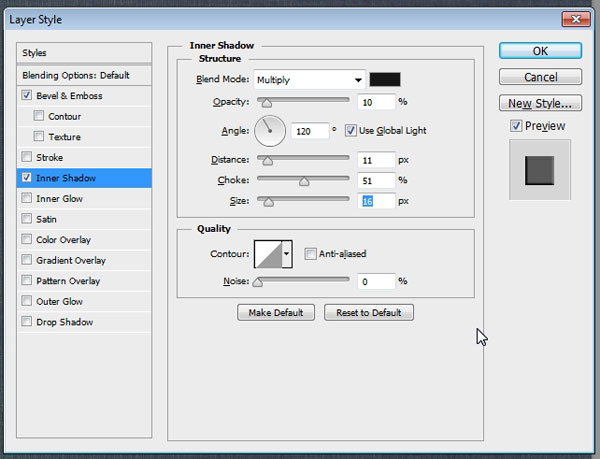
6. Without closing the “Layer Style” window, select the “Inner Shadow” option and change the settings
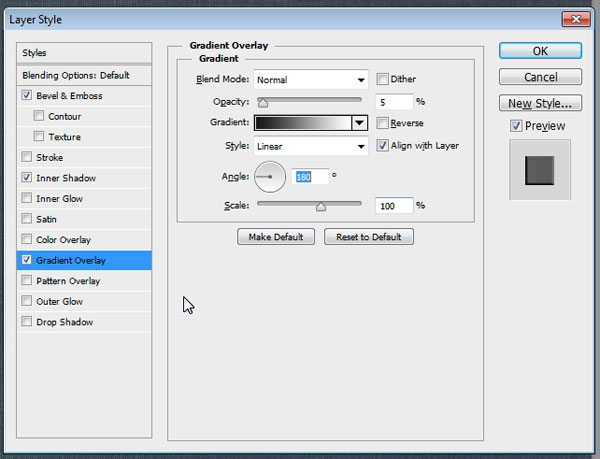
7. Navigate to the “Gradient Overlay” tab and once again change the settings so that they match the diagram below. You will be using a black and white gradient, so remember to open up the gradient editor and set the colors to absolute black (R:0, G: 0, B:0) and white (R:255, G:255, B:255) for the best results.
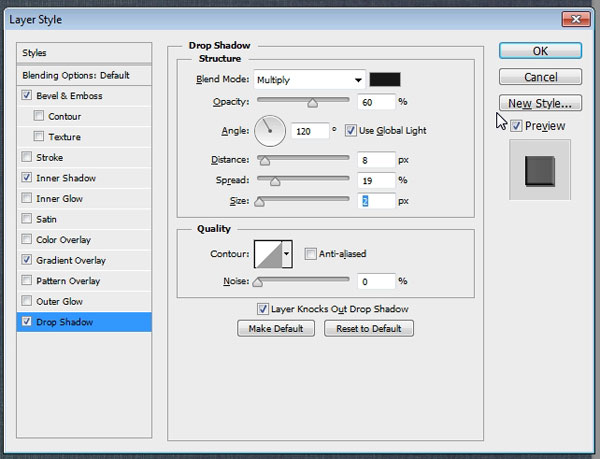
8. Navigate to the “Drop Shadow” tab in the “Layer Style” window and change the settings to match below. Then you can click OK to finalize the changes you’ve made to the layer.
9. Create a new layer for the light source. Select this layer, hold down the CTRL key, and click on the thumbnail of one of the layers with with your logo on it. This will allow you to create a selection on the light layer that is the same shape as the logo layer.
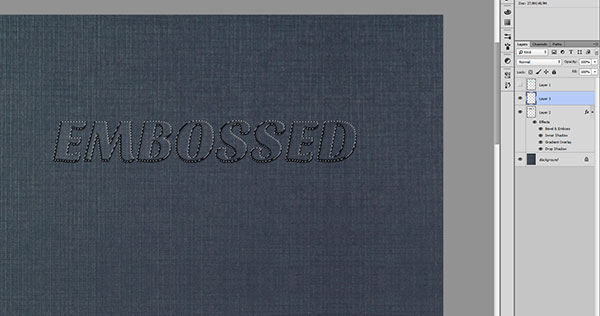
10. Select the “Paint Bucket” tool and fill in the selected area on the light layer with white.

Pro tip: Hit the “G” key to quickly bring up the “Paint Bucket” tool.
11. Using the arrow keys on your keyboard, carefully move the selection four pixels to the right and two pixels down. One hit of the key will move the selection by one pixel.

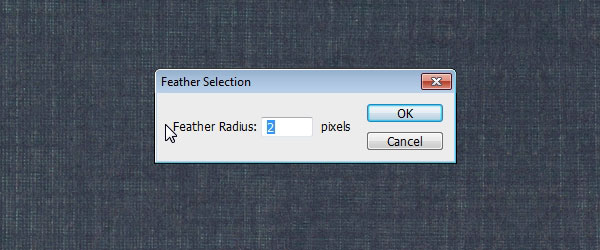
12. Click Select > Modify > Feather to bring up the feathering tool. Set the “Feather Radius” to two pixels. Press OK to feather the selection.
13. Once the selection has been feathered, hit the “Delete” key on your keyboard to clear away all but a few pixels of the white fill.
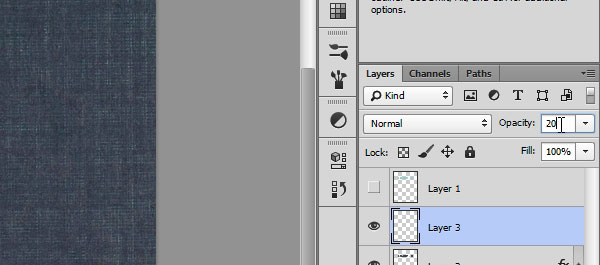
14. Set the opacity of the light layer to 20%.
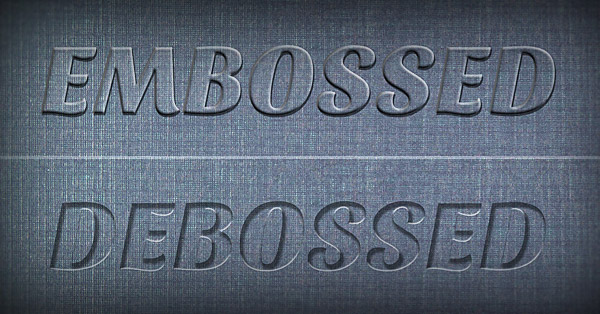
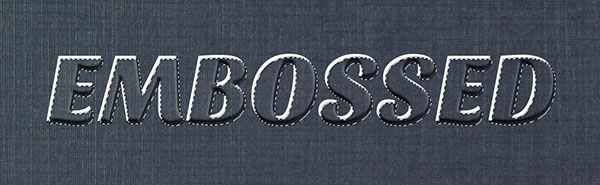
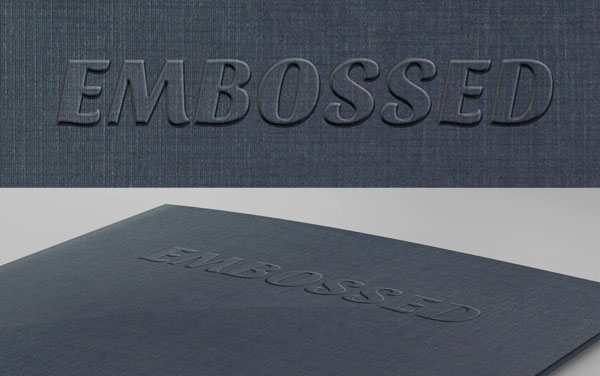
15. Save your image using CTRL+S. You should now have a realistic looking embossed effect, as shown in the image below.
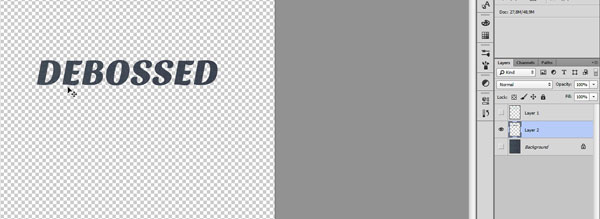
Creating a debossed effect
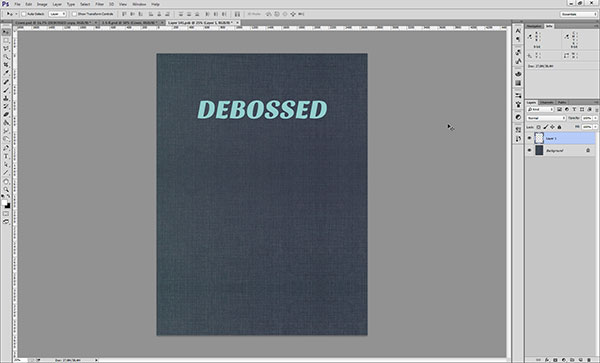
1. Just as in the embossed effect tutorial, you’ll want to paste the object you intend to deboss into a new layer using the “Paste as Pixels” option.

2. Set the correct size and position of the object.
3. Select the pixels on this layer by right-clicking the layer’s thumbnail and clicking Select Pixels. Alternatively, you can hold the Ctrl button and left-click the layer thumbnail.
4. Click the Background layer and then Copy by pressing Ctrl+C. Create a new layer (Ctrl+Shift+Alt+N) and then paste the selection you copied into this new layer by hitting Ctrl+V. This will give you a copy of your logo that appears to be composed of the same material as your background.
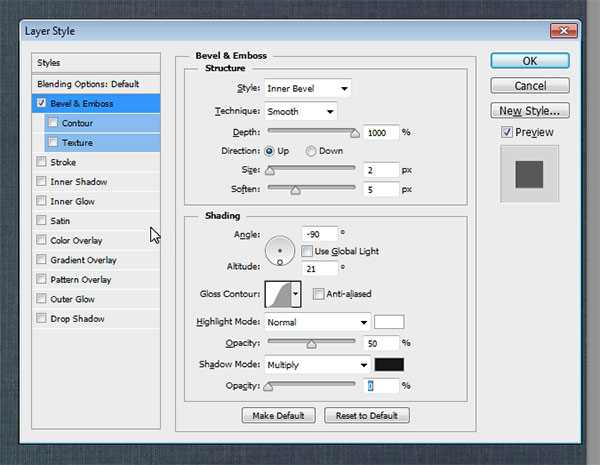
5. Double-click on this new layer and open the “Bevel & Emboss” tab. Change the settings so that they match the diagram below.
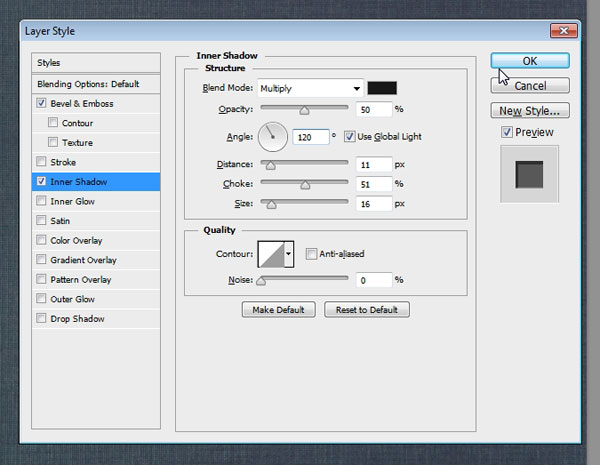
6. Select the “Inner Shadow” tab in the “Layer Style” window and change the settings to match the diagram below. Click “OK” when you’re done to finalize the changes you’ve made to the layer.
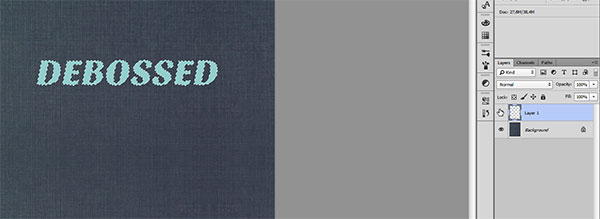
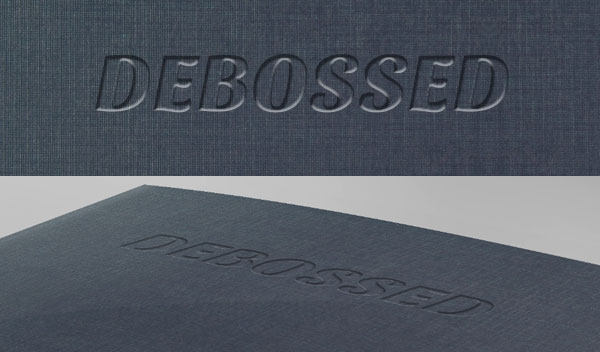
7. Your deboss text effect should now look like the example image below. You can now save your completed image using CTRL+S.
Final Thoughts
Not everybody is as creative as you are. Sometimes your clients (and potential clients) need to see exactly what a design will look like on paper. Use these effects to give them a better understanding of what the final product will look like.
Now that you know how to create embossed and debossed effects for your marketing collateral mockups, we want to see what you can do. Leave us your comments and feel free to submit your designs to the Folder Design Gallery.


If you’re interested in submitting a guest post, check out this page: https://www.companyfolders.com/blog/write-for-us
Can you be more specific about the issue you’re having? Where are you having problems?
This embossing effect produces an even height over the entire embossed surface. In real life the height of the embossed line greatly depends on it’s width. So very thin lines are hardly embossed compared to thick lines. It is especially noticeable on calligraphy and script fonts. If these fonts are not adjusted for embossing, the REAL embossing could look quite uneven and unattractive.
Is there a Photoshop technique to simulate how would the real embossing look like?
Somehow tie-in the line’s width to it’s embossed height.
This technique does not to work for an all white background. Any tips for working with a background that is not textured or colored?
I have done the deboss several times and when I’m finished you can’t tell I did anything. When I have just the new layer selected I can see the changes but when I make the other layers visible you can’t tell anything. Is it the text or the background I’m using? I’m using a leather book cover and Viner hand ITC text and trying to get a stamped into leather effect. I have tried 4 other tutorials and they don’t work or look awful.