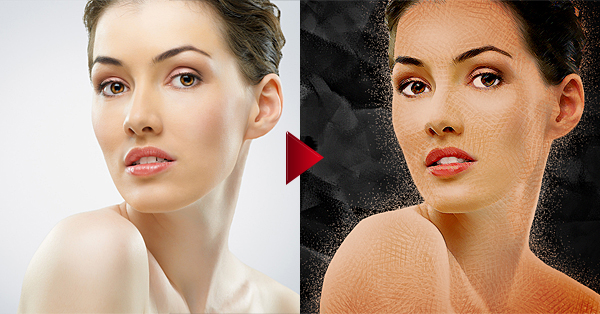
The best thing about Photoshop is that it allows you to do things in a few minutes that would normally take hours or days to complete. Case in point: instead of spending half a lifetime painting a picture, you can use Adobe Photoshop to make a photograph look like a hand-painted masterpiece in minutes.
Converting a photo into a painting takes more than just using Photoshop’s default tools. You need a variety of filters, brushes and design techniques to actually make it look realistic. Fortunately, it’s still an easy process, especially since we’ve spelled it all out for you in this tutorial.
Before class begins, you’ll need to download a few school supplies. To follow along with the tutorial, you’re going to need this photograph (right-click to download it to your computer) as well as two brush sets pulled from our roundups of cool Photoshop brushes.
The brush sets are:
Creating the background
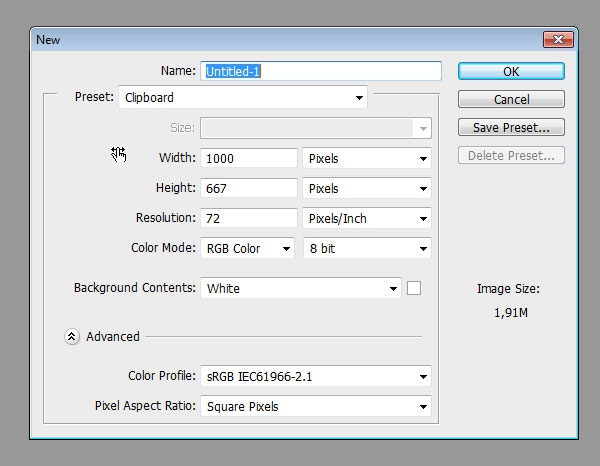
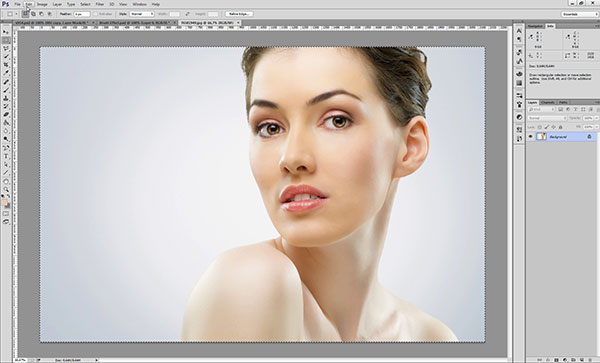
Let’s start by opening up a new document in Photoshop by clicking File>New or using the Ctrl+N shortcut. You want your canvas width to be 1000px, canvas height at 667 px and a resolution of 72 ppi.
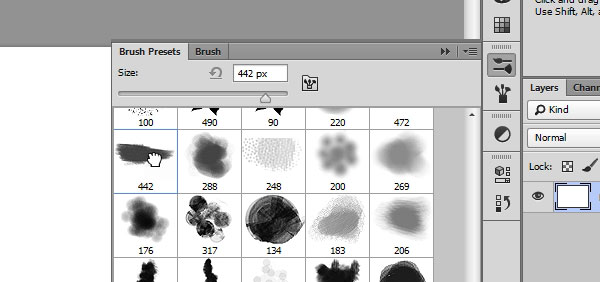
Open up the Brush Tool from the menu or by pressing the B shortcut. This will bring up the brush options on the right panel. You can click on the Brush Presets from here, or select Window>Brush Presets to bring up the brush menu.
If you haven’t already, now would be a good time to download that texture brush set and pull up the brush labeled 422. It should look like the brush in the picture, sort of a horizontal swatch that tapers off at the end.
You’ll need to make a few adjustments before it’s ready to use. Click on the Brush tab next to Brush Preset tab.
First, toggle on the Shape Dynamics option and set the parameters to the numbers shown in the image below. Set the jitter size to 100%, the minimum diameter to 0%, the jitter angle to 42% and the jitter roundness to 0%.

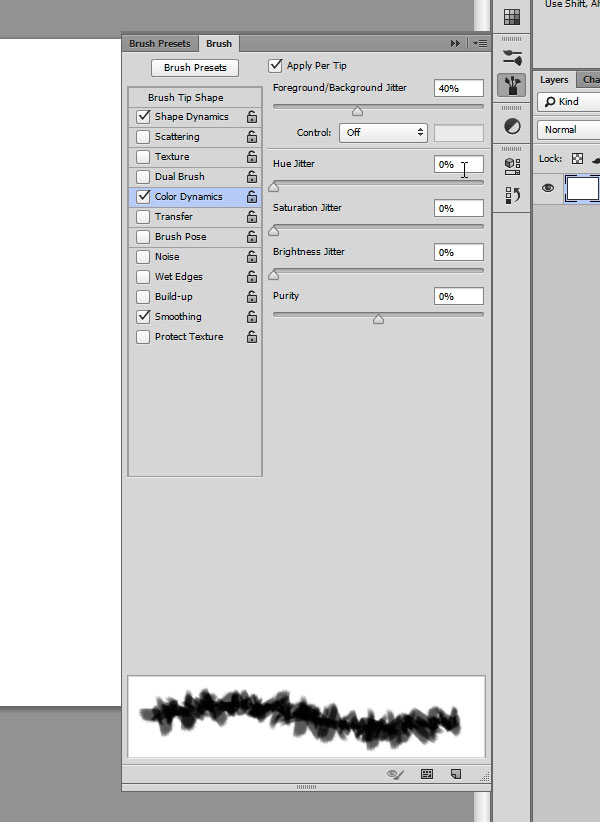
Next, select the Color Dynamics toggle and set the foreground/background jitter to 40%. Everything else should be set to 0%, as shown in the image.
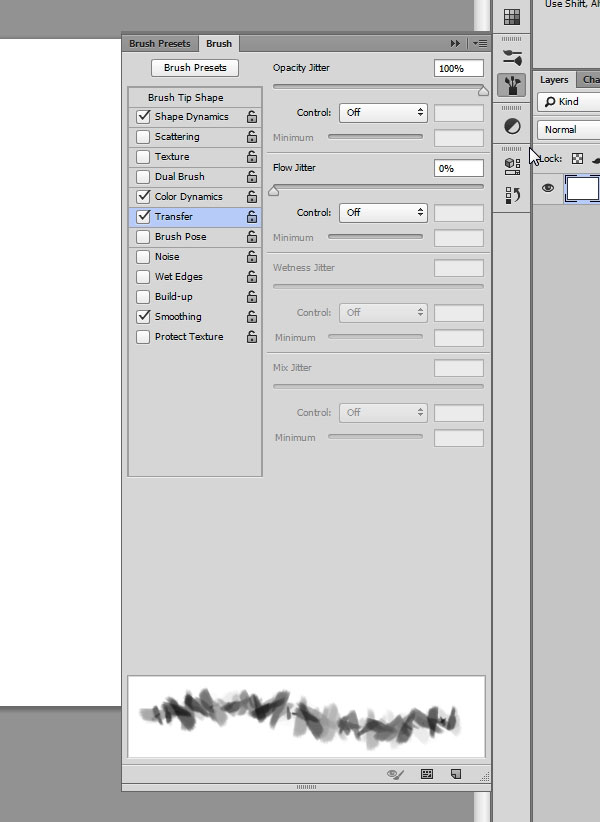
Finally, select the Transfer toggle and set the jitter opacity to 100%. Keep everything else at 0% or turned off.
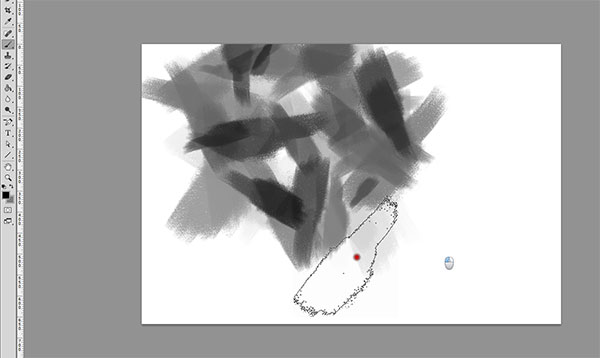
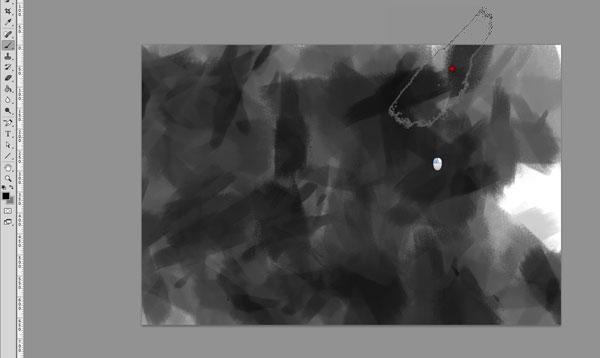
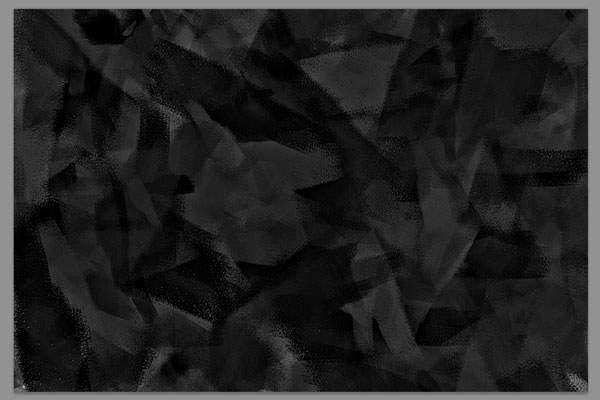
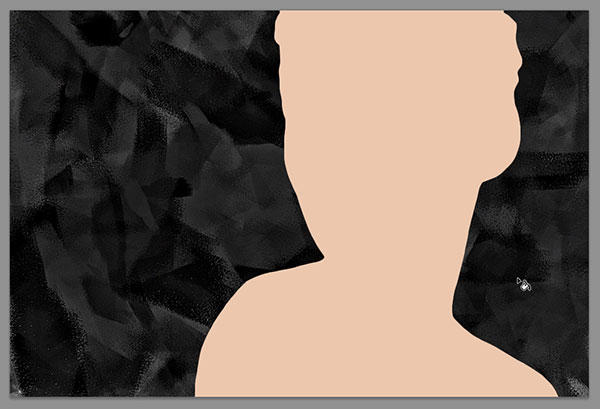
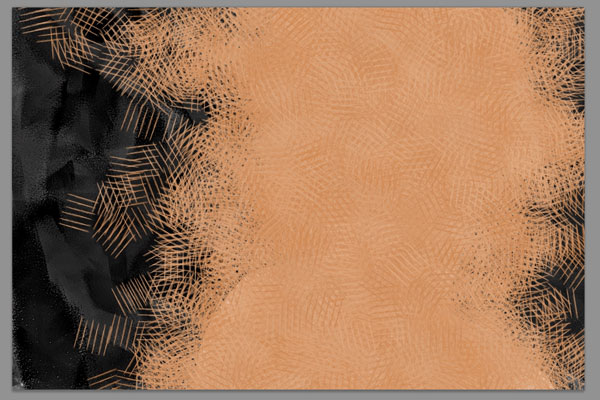
You’re now ready to start drawing the background, so set your foreground ink color to black and start filling in the white background by moving the brush back and forth over the canvas. As you can see in our example, the canvas should be completely filled and darkened, but there should be enough light areas to provide a textured look. Play with it until you get the result that you want.
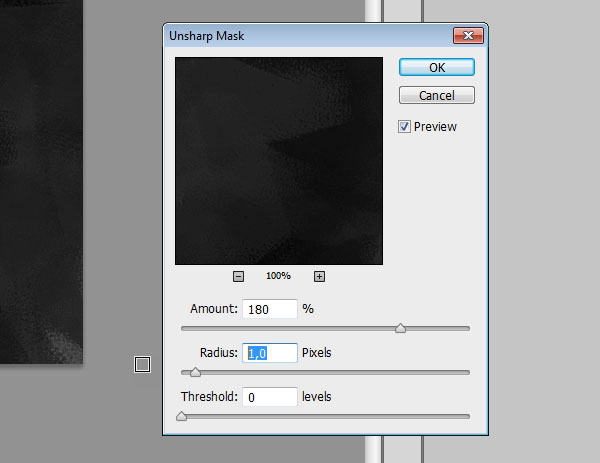
Now let’s make the background look more natural by adding an unsharp mask. Click on Filter>Sharper>Unsharp Mask, set the parameters as shown below, and press OK. This will draw out the lighter areas and create a more visually dynamic contrast.

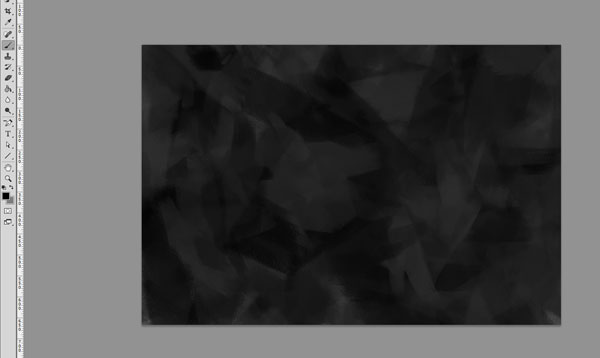
It’s an improvement, but it still doesn’t have that natural painting quality we’re looking for, so hit the image with the unsharp mask again (Filter>Sharpen>Unsharp Mask) and you’ll end up with something like our example shown. It’s a subtle change that you might not notice right away, but the double application brings out the finer details, looking more like real painted brushstrokes. And with that, your background is complete!
Creating the overall contour
Part 1: Adding the model
Let’s bring our photo into the mix (if you haven’t already, go ahead and download it). Open it up by clicking File>Open or using the CTRL+O shortcut. Select the entire photo using the CTRL+A shortcut and then copy it with CTRL+C or by clicking Edit>Copy.
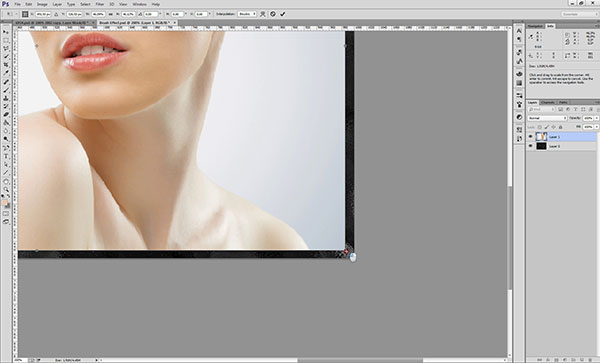
Switch over to your background document and paste the stock photo as a new layer with CTRL+V or Edit>Paste.
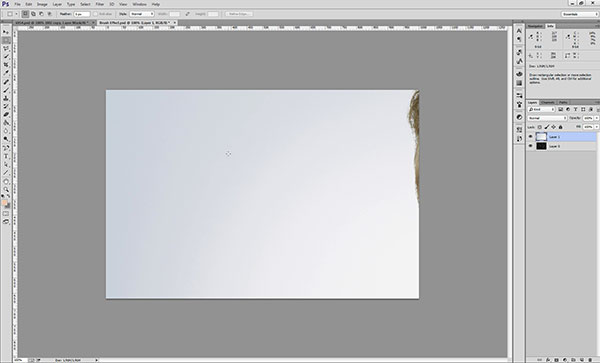
The stock photo is bigger than the canvas that we’re working with, but don’t panic. Use the Free Transform Tool (Edit>Free Transform or CTRL+T) to manually resize the stock photo so that it fits snuggly inside the canvas as shown. If you need to zoom in while in free transformation mode, you can use the + and – keys while holding down CTRL to change the canvas view. Exit out of the free transform mode by hitting the Enter key once you have the picture at the correct size.
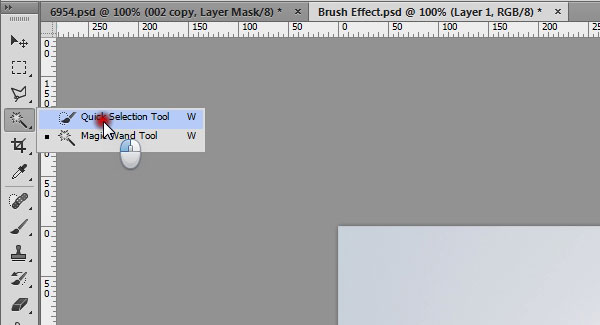
Now you’ll need to isolate the model from the background. We find the quickest route is the aptly named Quick Selection Tool (just hit W on your keyboard.) You can also use the Magic Wand Tool if you prefer (Shift+W)-whatever gets the job done.
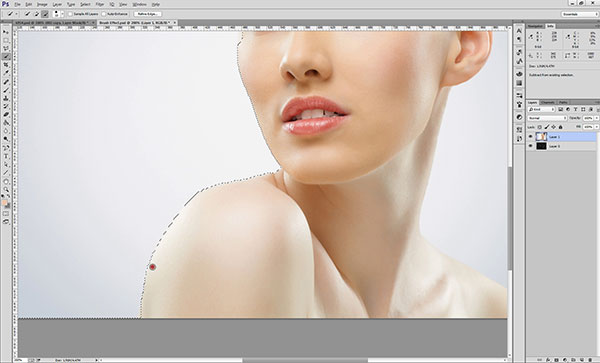
Click on the white space in the background to select it. You’ll notice right away that the selection bleeds into the model.

You’ll have to spend a little time cleaning this up so that the selection perfectly outlines the model. Hold down the Alt key and click-and-hold the mouse to exclude any parts of the model that may have been selected by accident. Use the Shift button to include any parts of the background that have been left out. You may have to zoom in to get the finer details in there.

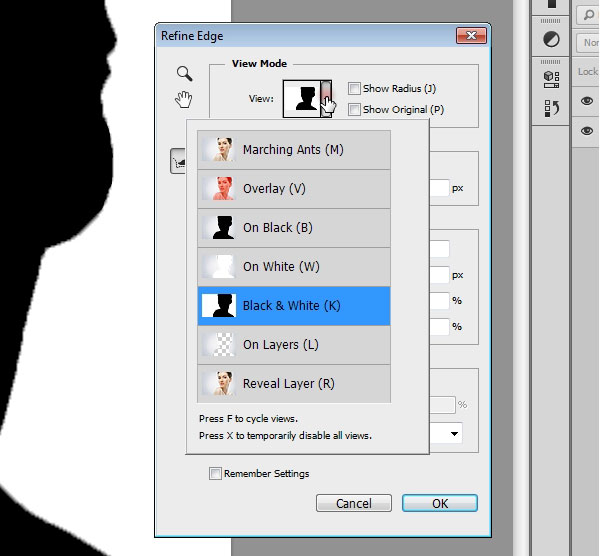
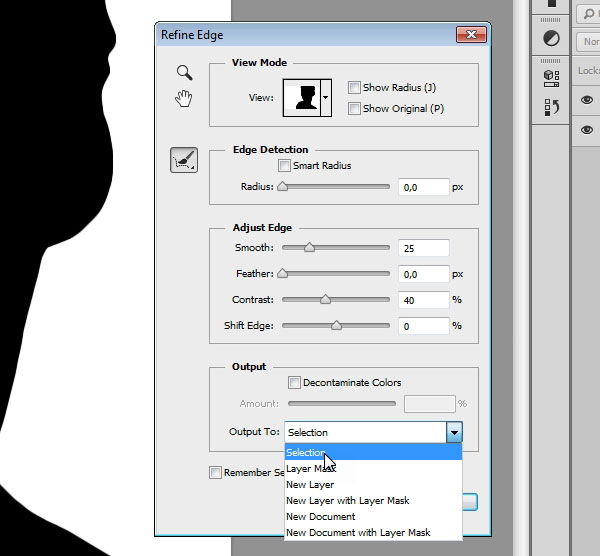
Once your model is completely selected, click on the Refine Edge button in the option bar. Set the refine edge effect for black and white, then in the next menu set the smooth edge at 25, the contrast at 40% and leave everything else set at zero or unselected. Also, make sure that the output is set to selection. This will help the selection be a little less rough around the edges.
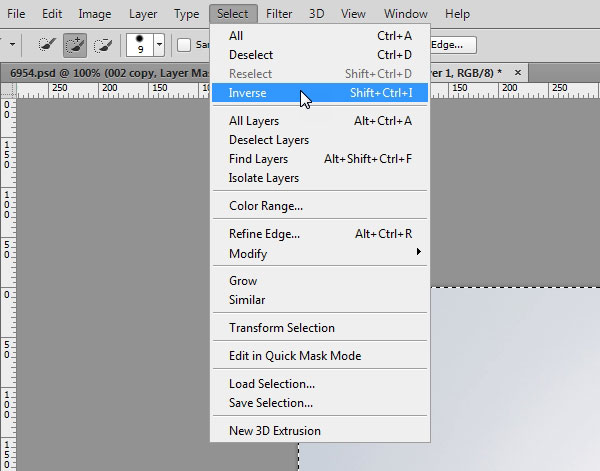
But since we want to work with the model, not the boring white background, let’s invert the selection by clicking Select>Inverse.
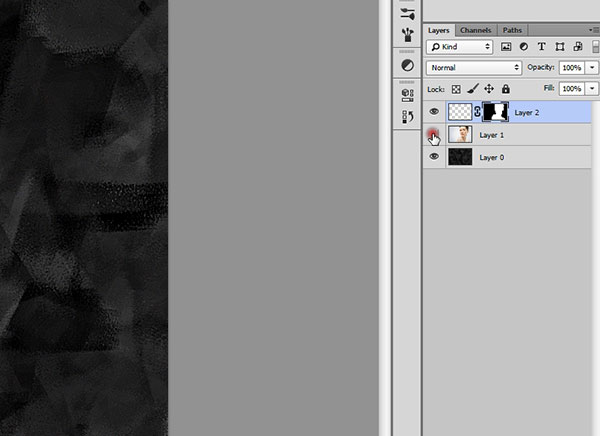
With the model still selected, created a new layer by clicking Layer>New>Layer or Shift+CTRL+N. Create a mask for this layer by clicking Layer>Layer Mask>Reveal Selection. Your active selection will now become a mask.
We’re going to do some stuff now that we’d rather not have all over the stock image just yet, so click on the eye icon next to the stock image layer to turn it invisible.
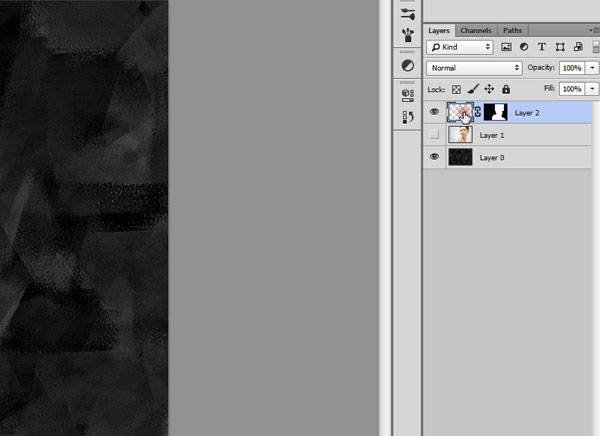
Now select the layer thumbnail above to activate that layer. Make sure it’s the layer itself you have selected, not the layer mask.
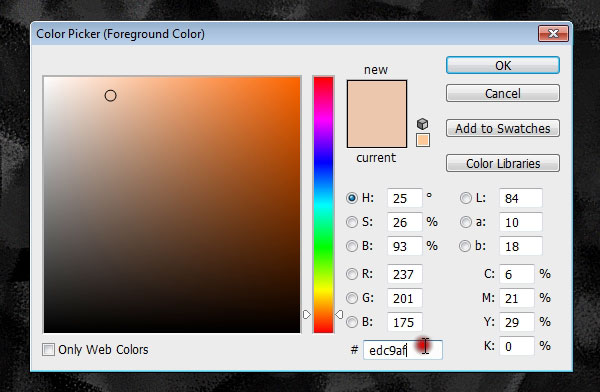
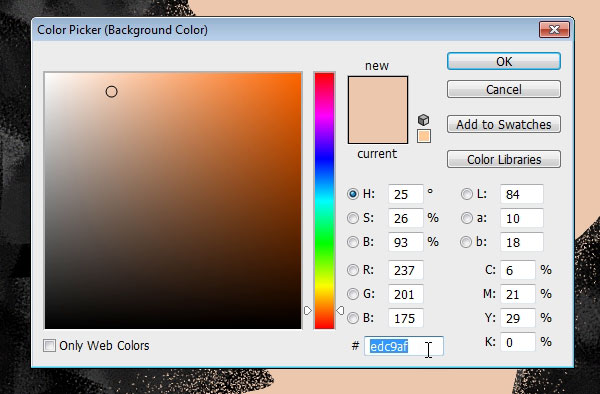
Open up the color picker and set the foreground color to #edc9af, as shown in the picture.
Select the color fill tool and fill in the layer completely. You’ll end up with a model-shaped silhouette.
Part 2: Adding an aura effect
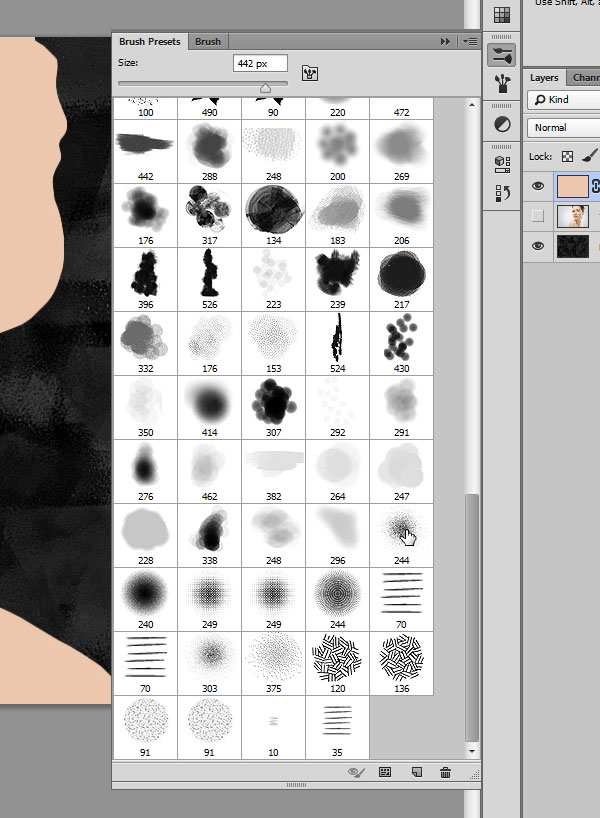
Now we can start adding some imperfections and simulated paint hatches to the image to make it look more like a painting. First, select the mask thumbnail so that you’re working with the mask instead of the top layer. Select the brush tool or hit B on your keyboard, then click on the Brush Presets on the sidebar.
This time we’ll be using a texture brush from the other set, so download the Dither and Hatches CS2 brushes if you haven’t already. Select the brush as shown in the screenshot marked 244. It’s a sort of crunchy, spray paint texture.
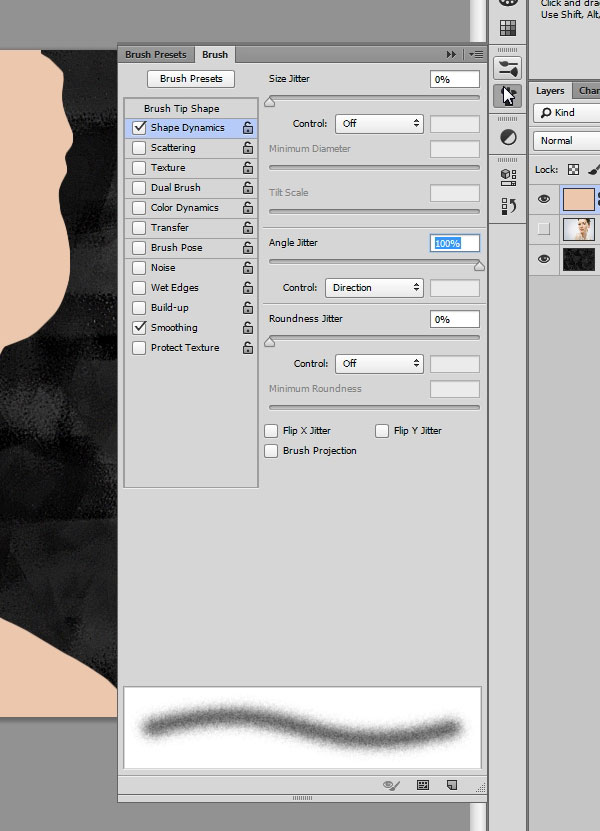
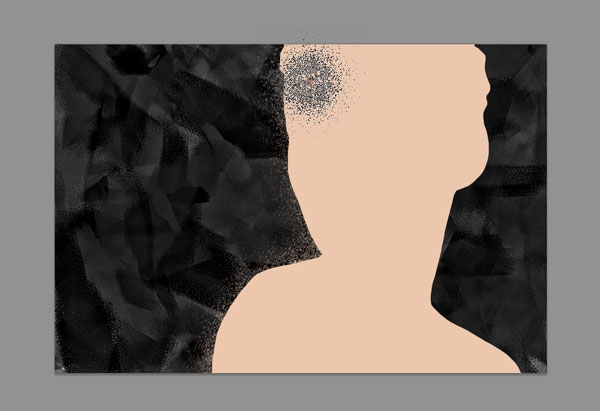
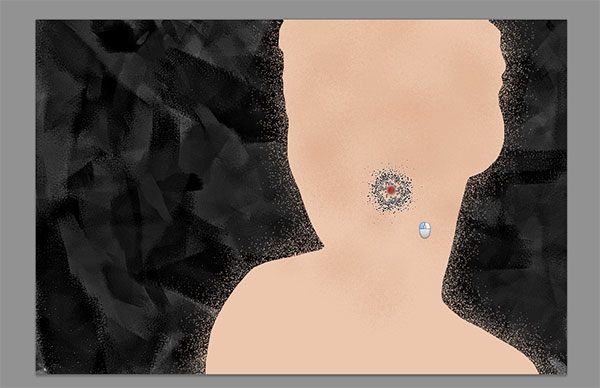
Once again, you’ll have to click on the Brush tab and select the Shape Dynamics. Set the angle to 100% and leave everything else at 0% or unselected, as shown in the image. Now you can start creating the paint aura around the model.
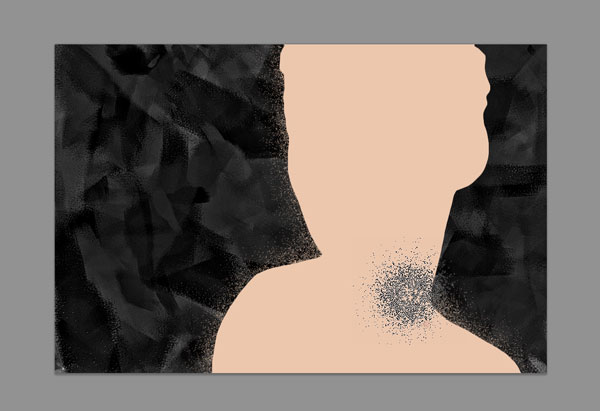
This time, lightly spray the brush in clusters around the silhouette of the model as shown. The idea is that you want most of the brush to cover the model so that the aura is tight around the silhouette. Don’t hold down the brush and spray in a continuous stroke because you’ll end up with the wrong effect. Spray one application at a time until you like what you see.
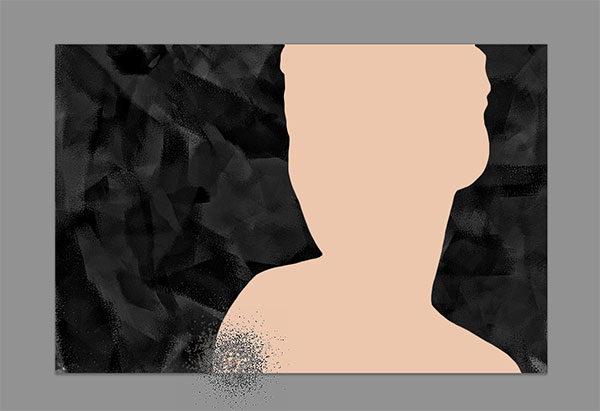

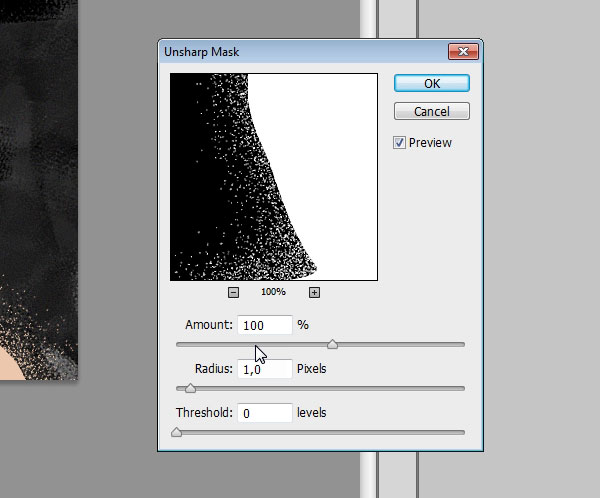
Now we want to bring out the contour aura a little more and give it more detail, so click Filter>Sharpen>Unsharp Mask and set the amount at exactly 100%. The radius should be set at 1.0 pixels and the threshold level at 0.
Part 3: Texturizing the subject
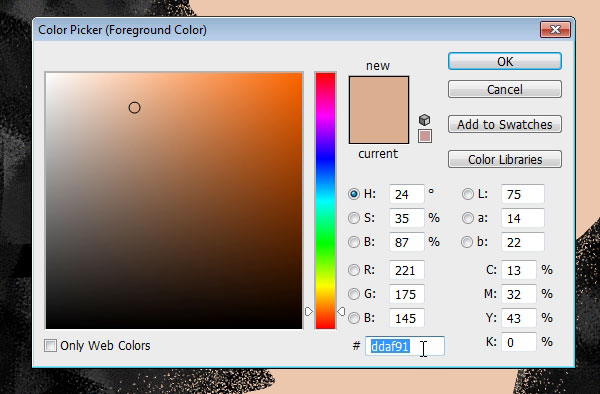
While we’re still working with the overall contour, let’s add some texture to the model to look more like actual paint. To do this, we’ll add some subtle light and shadow to the flat silhouette. Set the foreground color to #ddaf91 and the background color to #edc9af.
Open up the same spray brush from before, only this time we’ll be making some different adjustments in the Brush tab. Activate the shape dynamics toggle and set the jitter size at 50%, the angle at 100% and everything else at 0 or off.
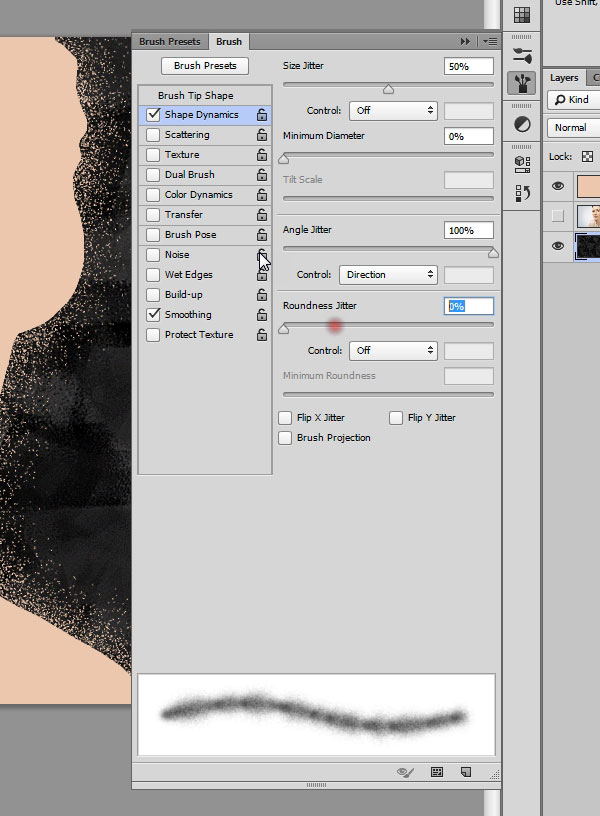
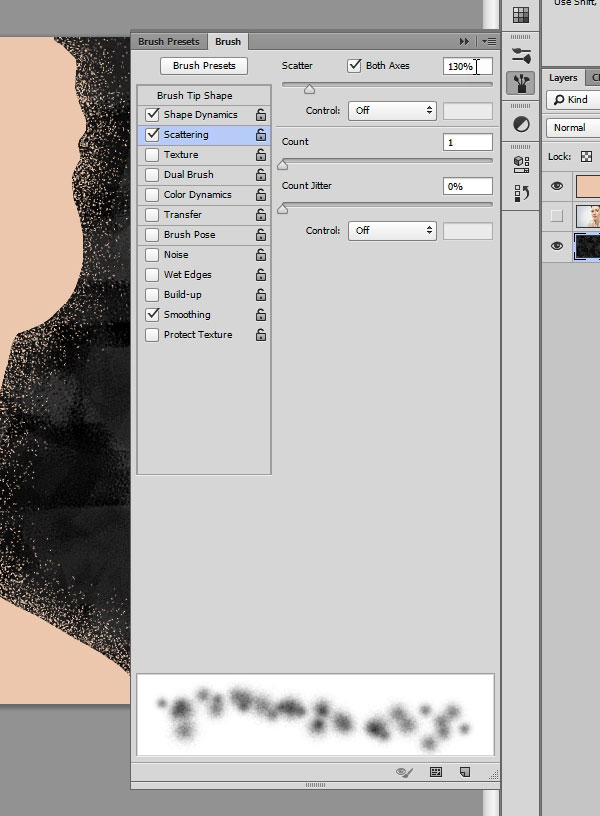
Toggle the scatter option and select both axes, set at 130% with the count slider at 1 and everything else at 0 or off.
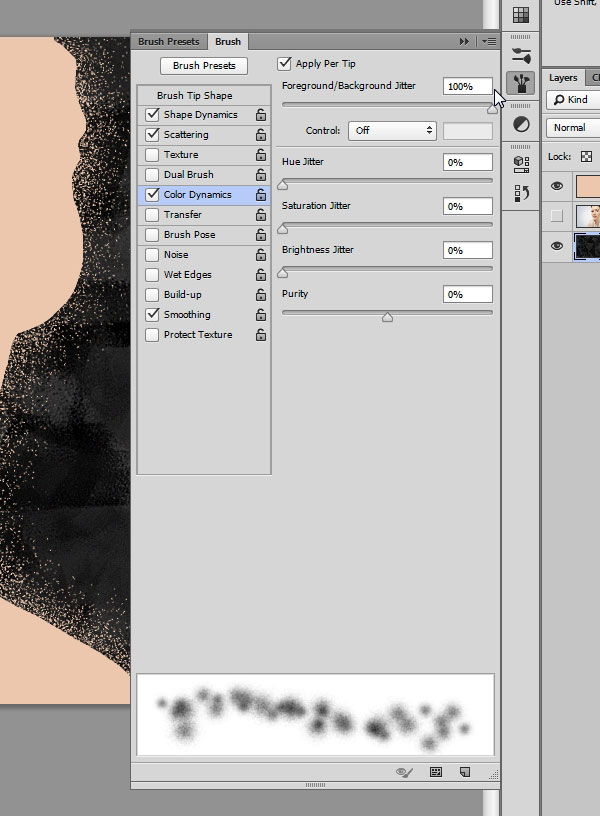
Finally, toggle the color dynamics and set the foreground/background jitter to 100% with everything else at 0 or off.
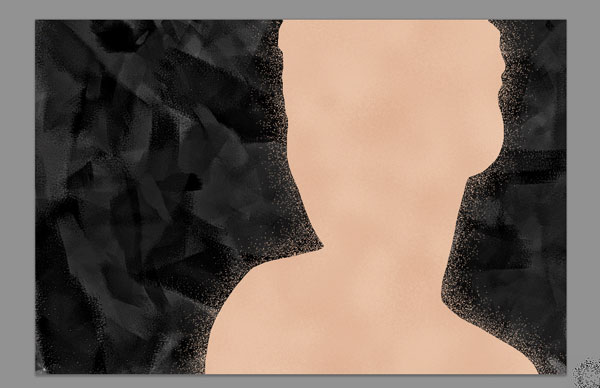
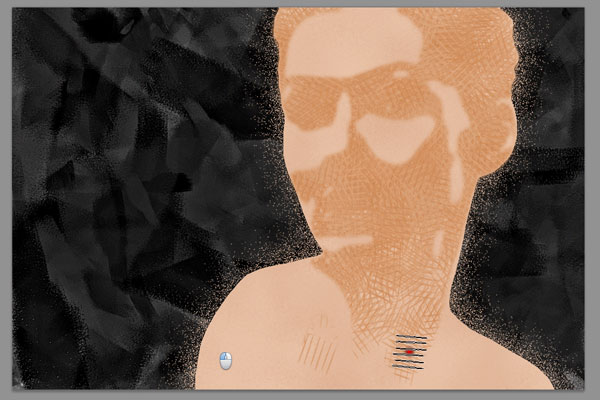
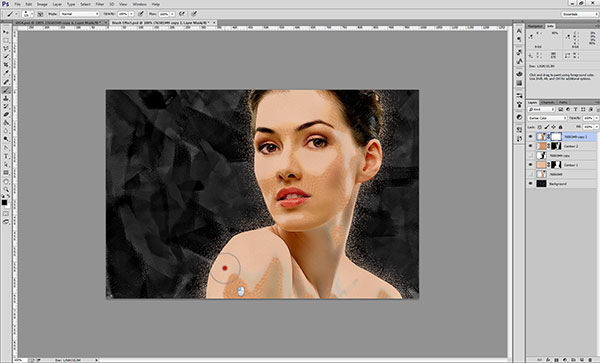
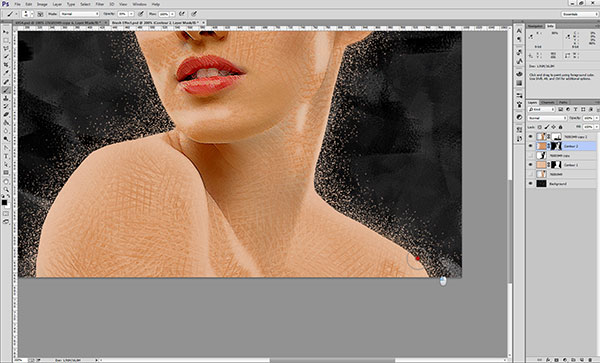
Select the top layer once again so that you’re not working with the mask anymore and start applying the brush strokes to create texture. It will take several applications for the texture to show through, but as you can see in the example image, the ideal result is light and subtle.

Creating the shadow contour
With the contour complete, we can move onto the shadows. Make a duplication of the stock image layer by clicking Layer>Duplicate Layer or using CTL+J. Move this new duplicate layer above the first contour layer so that it’s the very top layer. If this layer is still invisible, make it visible so that you can work on it.
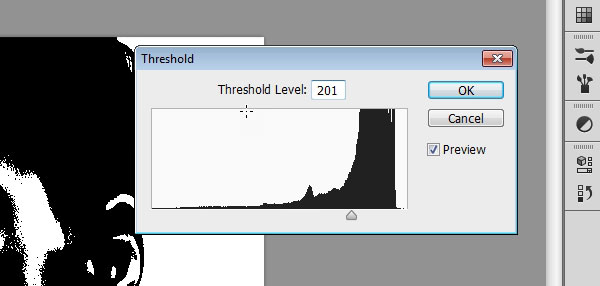
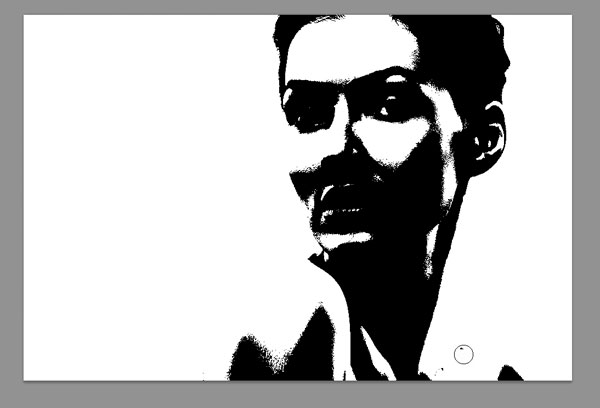
Click on Image>Adjustments>Threshold and set the threshold at 201. This will create a sort of black-and-white stencil image of the model.
After adding the threshold, you’ll be left with some stray bits here and there that aren’t really a part of the shadow contour, so clean them up using a solid white paint brush.
Now you can select the stencil image using by bringing up the Magic Wand Tool, unchecking the Contiguous checkbox in the tool option bar and clicking on any black area.
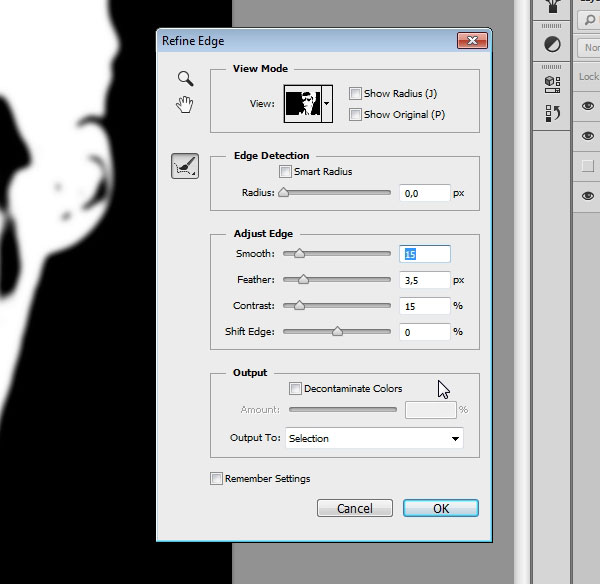
Once again, we want to make this selection a little smoother, so bring up the Refine Edge menu by clicking the button in the option bar. In the Adjust Edge submenu, set the smooth option to 15, feather to 3.5 px, contrast to 15 and everything else at 0 or off.
Make this layer invisible once again and with the area still selected, create a new layer. Create a mask for this layer by clicking Layer>Layer Mask>Reveal Selection. Now the active selection will become a mask on this layer-however, right now we don’t want to work with the mask. Instead click on the layer itself.
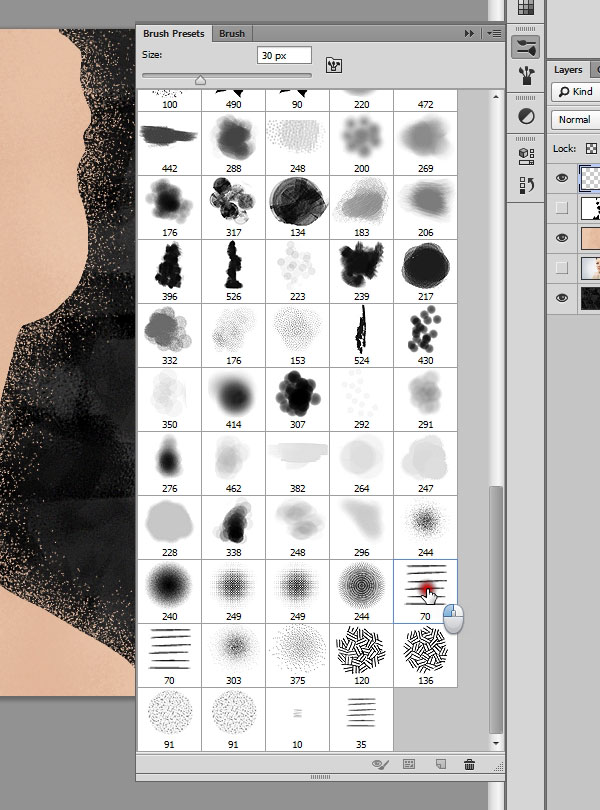
Bring up the brush tool and pull up a different brush from the same Dither and Hatches CS2 set, as shown in the image. The brush has a few thin horizontal hatches and is labeled as 70px.
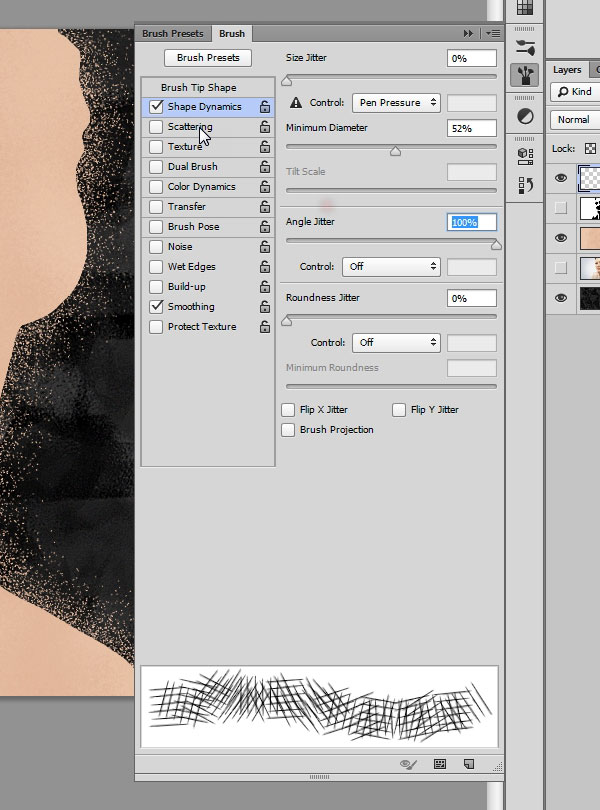
Click the Brush tab and select Shape Dynamics, setting the minimum diameter at 52%, the jitter angle at 100 and everything else at 0 or off.
Select Scattering and select both axes at 300%, with the count slider at 1 and everything else at 0 or off.

Finally, select Color Dynamics and set the foreground/background jitter at 40%, the saturation jitter at 2%, the brightness jitter at 2% and everything else at 0 or off.

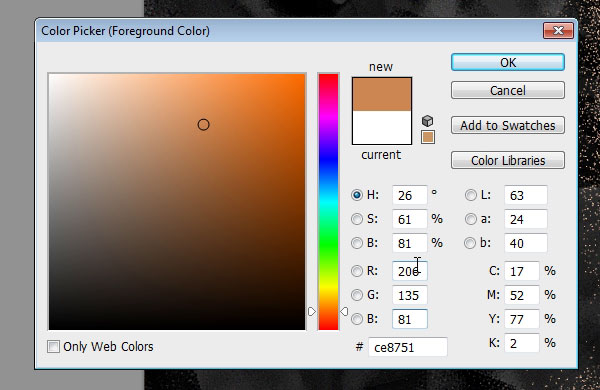
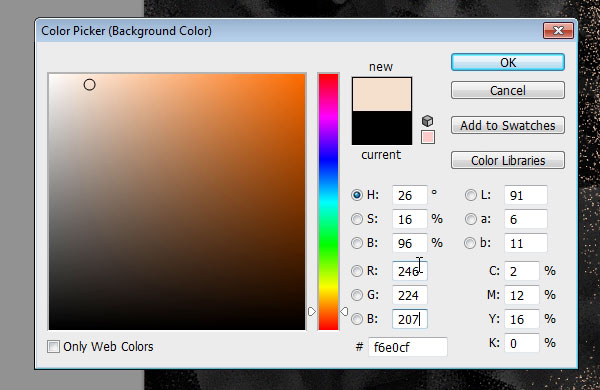
Now set the foreground color at #ce8751 and the background color at #f6e0cf.
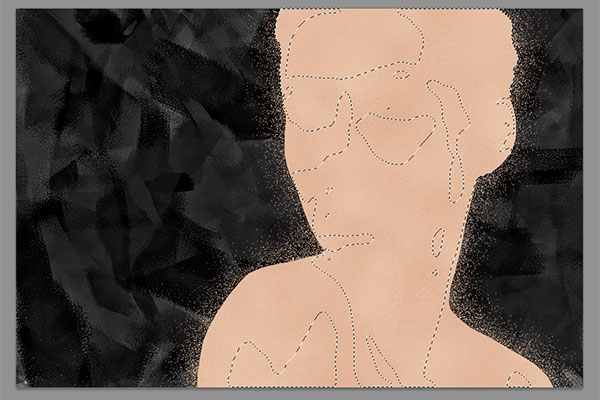
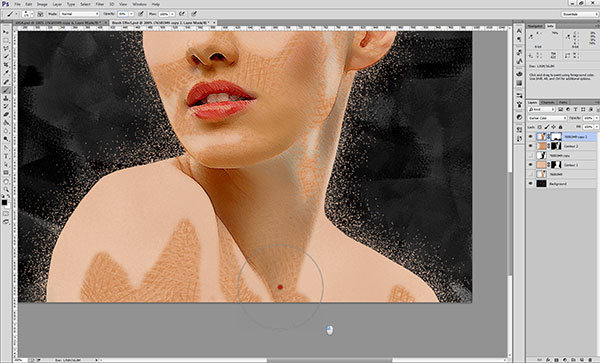
We can now start drawing the shadow texture. Move the brush back and forth to make the shadow visible.
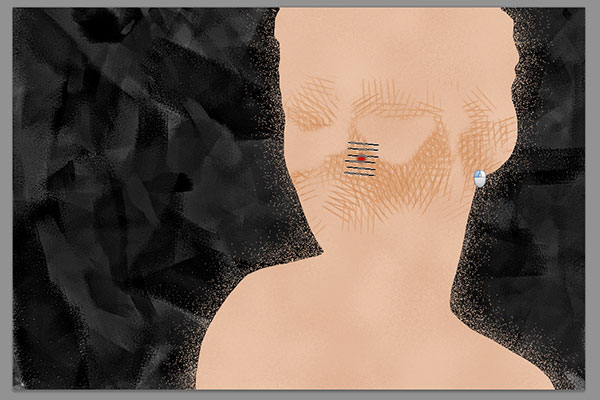
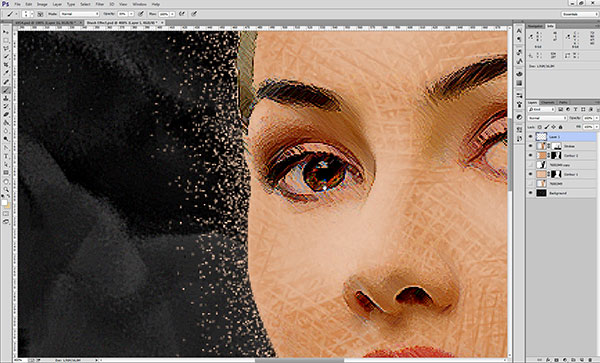
You want to move the brush in a wider area than just where the selection is located. When the mask layer is invisible, it should look something like the picture below.
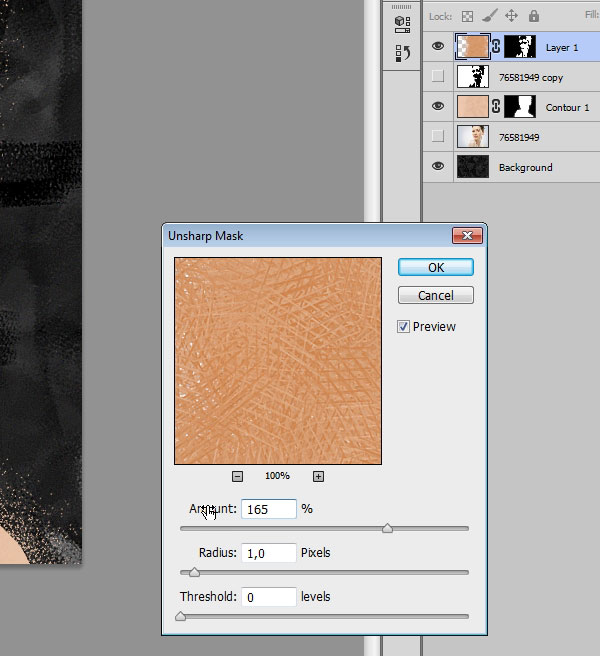
Fill in the shadow texture until you’re pleased with the results. Now, bring up the up the Unsharpen Mask tool once again. Set the unsharpen ratio at 165%, with a radius of 1.0 px and a 0 threshold level. This will bring out the hatch texture and make it look a bit more realistic.
Adding finer detail
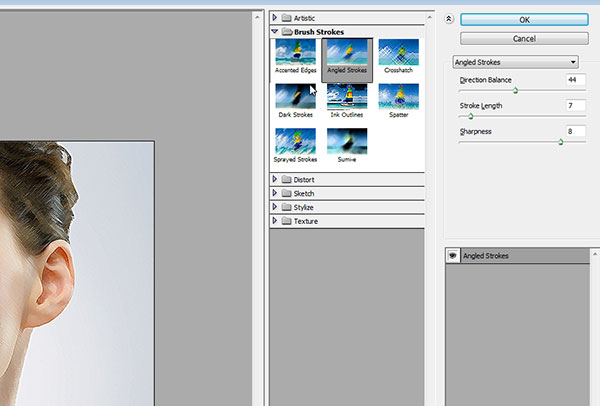
Now that we have the general strokes figured out, we’re going to go in and give the picture more detail. Let’s start by making another copy of the original photograph layer and placing it at the very top of the layer menu. Make this layer visible if you haven’t already, then click Filter>Filter Gallery and select the Angled Strokes effect in the Brush Strokes subfolder. In the Angled Strokes menu, set the direction balance at 44, the stroke length at 7 and sharpness at 8. This will make the light sources look more like angled brush strokes.
Now, set the layer’s blending mode to the option labeled Darker Color. This will make it so that the details of the top layer combine with the textures in the layers underneath.

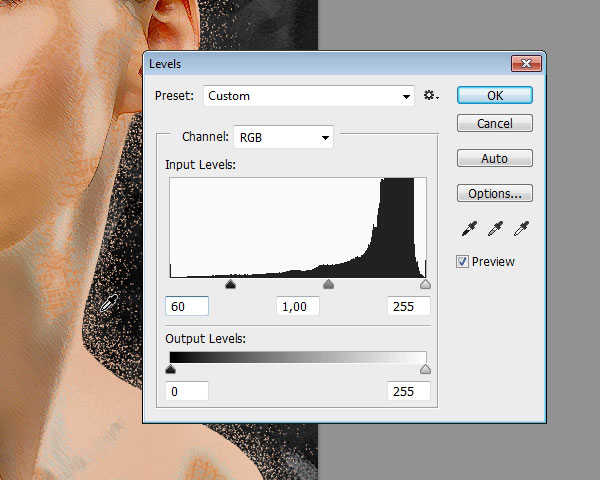
Select Image>Adjustments>Levels or hit CTRL+L and set the levels like in the image, so that the lowest input level is 60. This will darken the details and make them stand out better over the textures.
Create a mask for this layer by clicking Layer>Layer Mask>Reveal All or clicking on the mask button. Click on the mask layer thumbnail so that you’re working with the mask and not the layer itself.
Select the default brush tool, and press the D button to set the background and foreground colors to default.
We want more of the texture underneath to come through, so use the paintbrush to paint the problem areas where there’s weird shadows or where details aren’t showing. You can adjust the opacity of the brush to have more control over how much you reveal.
Switch between black and white by pressing X or clicking between the foreground and background swatches.The default black will make the mask more visible, while the default white will take away from the mask. Look out for tricky problem areas, like the dark lines that appear around the edge of the model’s skin.
Once you have it the way you like it, do the same to the shadows in the picture. Switch to the Contour 2 layer, the one you used to create the shadow contour. Click the mask layer so that you’re working with just the mask, not the layer itself.
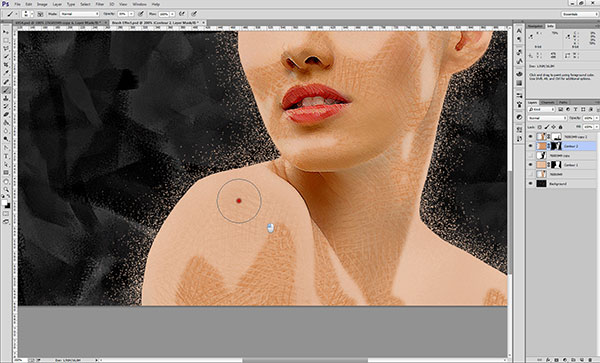
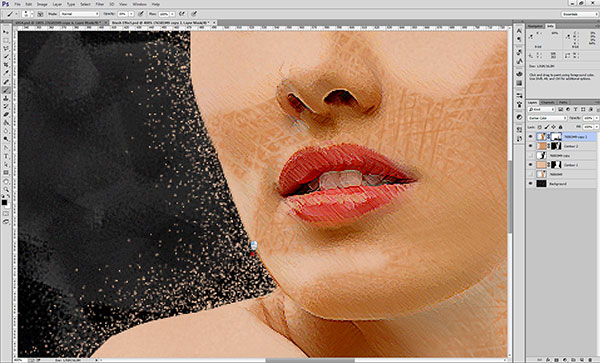
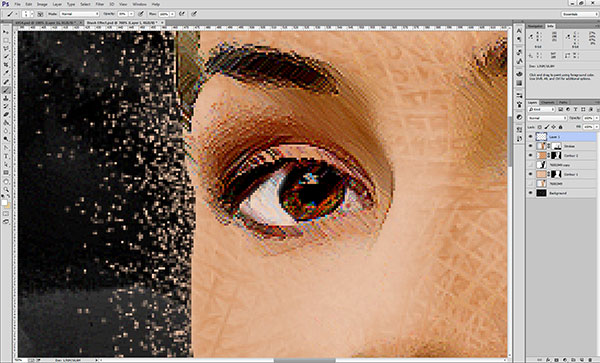
Like before, use the default brush at different opacities to manipulate the mask layer to allow more or less of the texture to show through. You’ll have to spend some time working with it to get it the way you like so that you end up with results similar to our example.

Whitening the eyes and teeth
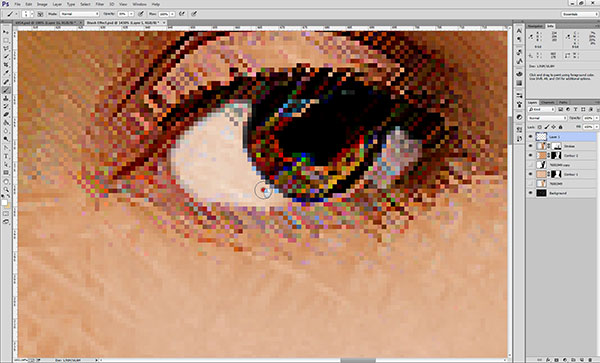
What we have so far looks cool, but the white areas in the model’s eyes and teeth have been put through so many filters and textures now that there’s a sort of ugly color bleed when you look closely. This is an easy fix, we just need to add some white areas.
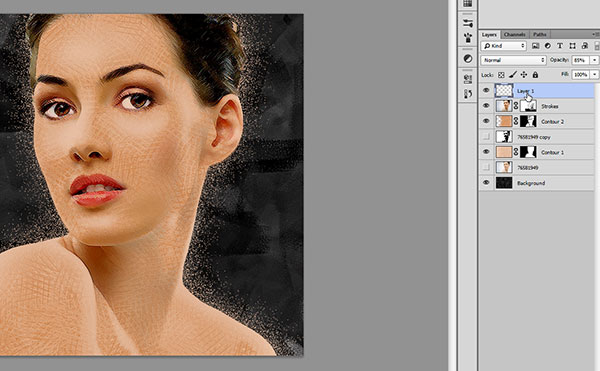
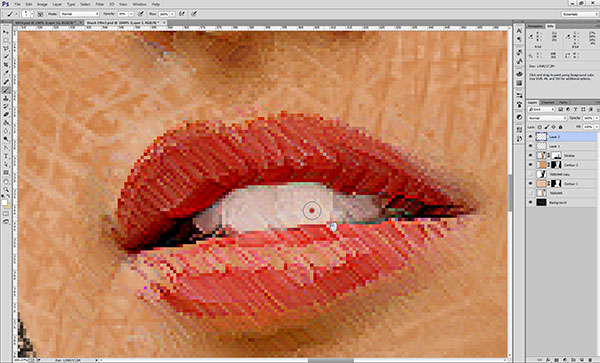
Create a brand new layer and place it at the top of the layer list. Select the default brush tool with default white as your foreground color and the brush opacity at 30%. Paint the white areas of the eye using the brush. Don’t forget to add white to the areas of the pupil, where there’s a reflection of light.
You don’t want the eyes to look so light that they’re scary, so play with the opacity settings of this layer until you get a whiteness that looks natural, without looking photographic (after all, we’re going for a painted look here.) We found our ideal setting was at 85%, but it’s going to depend entirely on how heavily you applied the white in the first place, so adjust until you get something like the example picture.
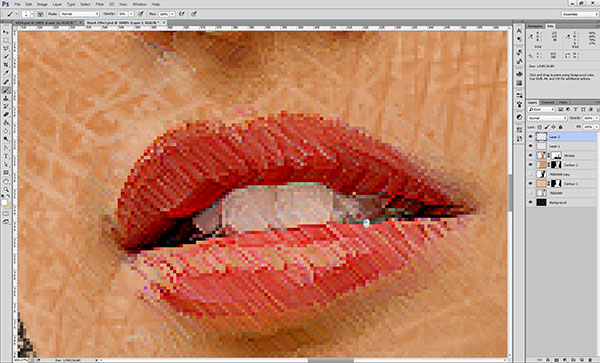
Once the eyes are taken care of, you should move onto the teeth. To make things easier, create yet another new layer and place it at the top. This way whatever you do to the teeth won’t accidentally affect the eyes.
Again, use the default brush and default white foreground color with only 30% opacity and carefully fill in each tooth. The teeth near the front should be a brighter shade of white than the teeth near the back, since there is more light hitting them. Once more, lower the opacity of the layer itself to make it look more natural. For this tutorial, we set it to 70%.
Adding light effects
The picture is looking pretty good now, but we can do better than just pretty good. Let’s finish off the picture with some dramatic lighting effects to make it more interesting.
Create a new layer and place it at the top. Select the Paint Bucket Tool or press G on your keyboard and then fill in the layer completely with any color.
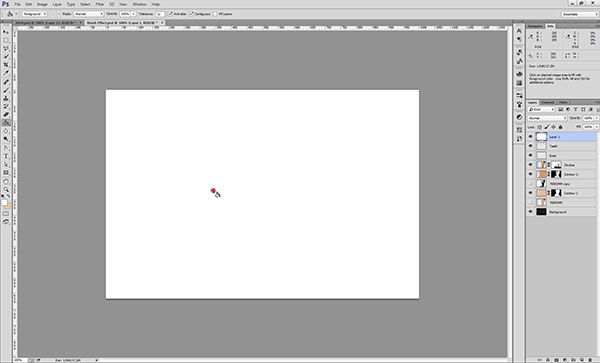
Change the layer fill amount to 0% in the layer menu and then double click on the layer to open up the Layer Style options menu.
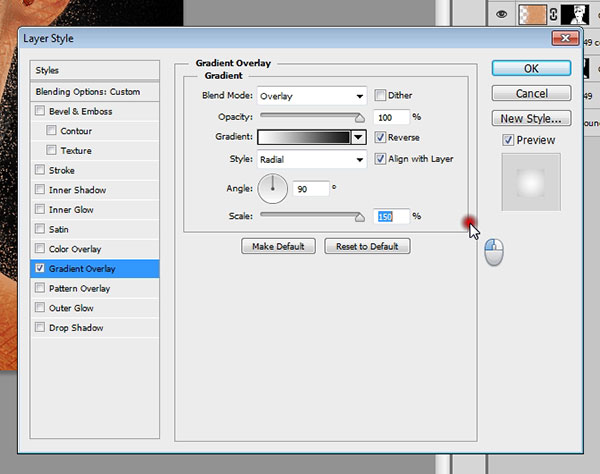
Click on the Gradient Overlay toggle and then set the blend mode to overlay. The gradient color type should be the default black-and-white gradient, only set it so that the colors reverse. Set the gradient style to radial and increase the scale to 150%.
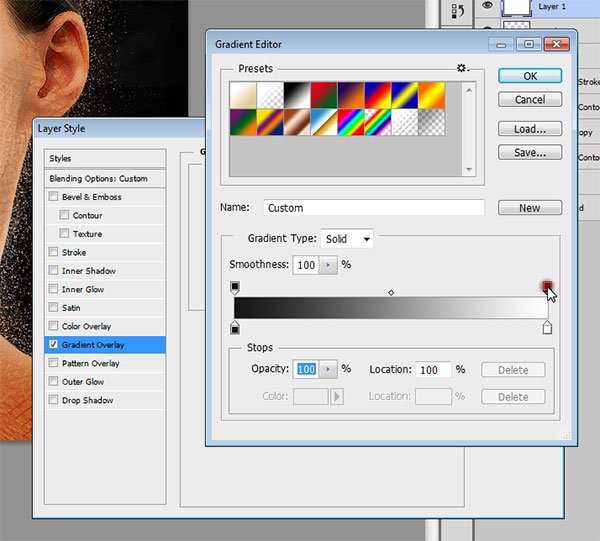
Next, click on the gradient color selector to bring up the color menu. Here you can play with the opacity settings for your gradient. We want to set it so that the white is completely clear, so that the black fades into transparency. Click the box in the upper right corner above the gradient, as shown in the image.
This will select the white value, which you can then set to 0%.
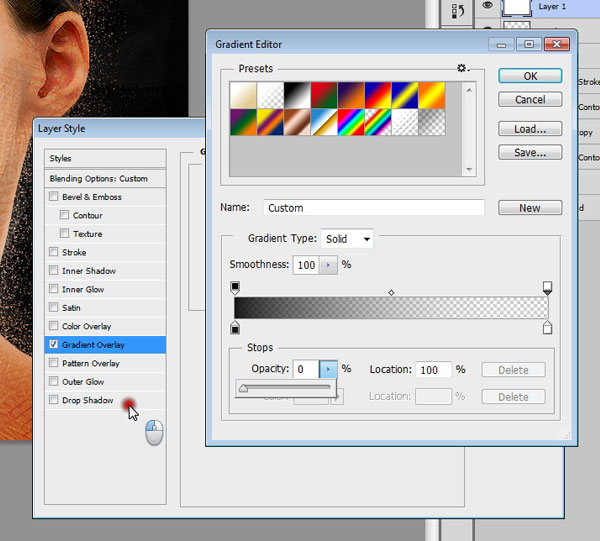
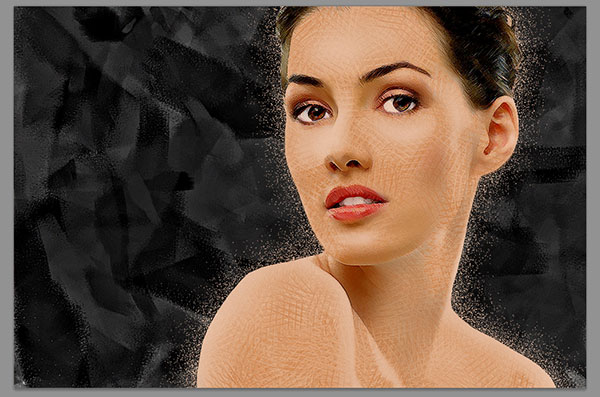
With this last little step, you’ve given your picture much more depth and drama, adding the finishing touches.
You did it!
If you’ve followed these steps correctly, you should have an image that looks like this:
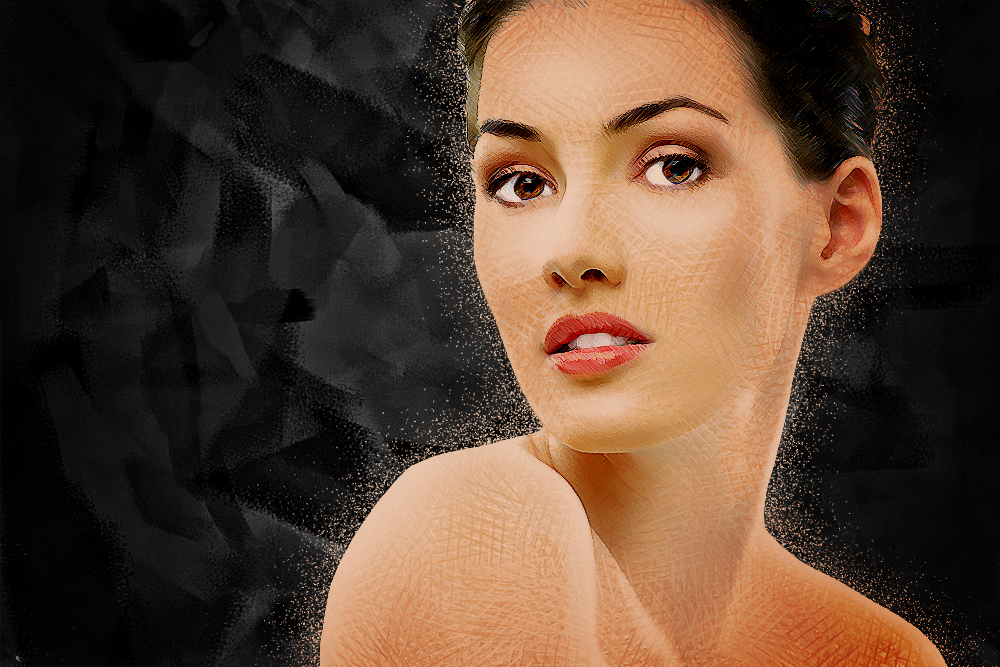
You can also download a PSD version of the working file we used for this tutorial.
Now that you’ve completed this tutorial, you can apply these same concepts to other images. Of course, you’ll have to slightly adapt the information from this tutorial to apply it to a different picture, but the root principles remain the same.
Whether you follow the tutorial to a tee or use it as a stepping stone to be experimental, we want to see your results. Share your best photo-to-painting masterpieces in the comments below and show off your hard work!