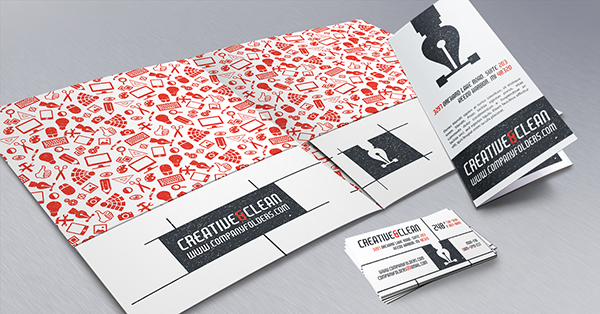
You’re ready to select print options for your new marketing supplies. But every time you pick something out, it won’t work. The printer says the stock isn’t compatible with the imprint method, or you can only coat Side 1 of your design, not Side 2. That would be fine, except that you’re trying to order folders—which obviously have more than two sides.
The printer isn’t much help, either; they’re just babbling on in their techy jargon, which sounds like it’s just a bunch of made-up words. That’s because they have a bad habit of forgetting that the printing industry is new territory for most of their clients. When they say you need to print double sided, they expect you to understand that Side 1 and Side 2 dictate all other aspects, like stocks, imprint methods, and coatings. To help you learn how to select the best options for your design, we’ve put together this handy guide to understanding two-sided printing.
What are Side 1 and Side 2?
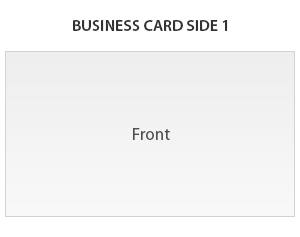
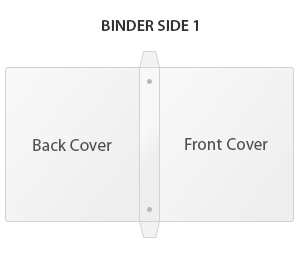
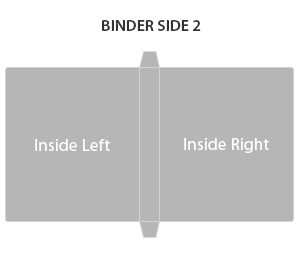
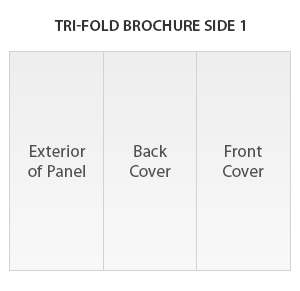
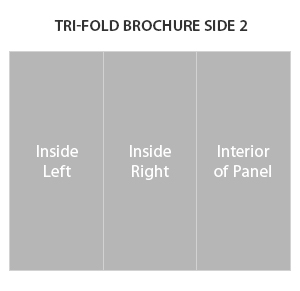
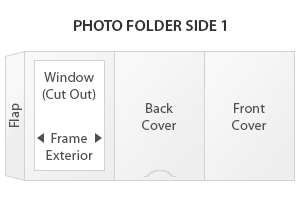
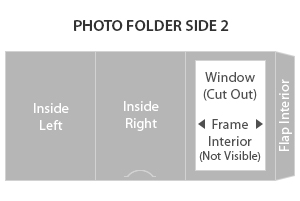
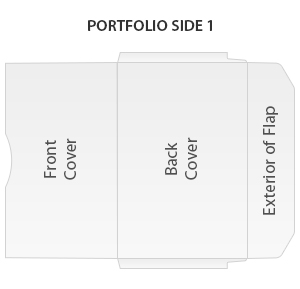
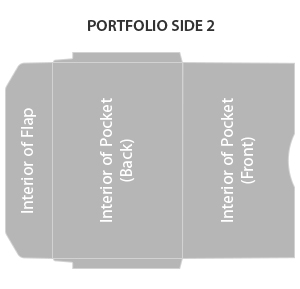
Your marketing materials start out as a dual sided piece of cardstock, just like ordinary paper. Stocks are imprinted in this flat position before being cut and folded into a final product. Since your product is double-sided when it’s imprinted, printers naturally refer to those two sides as Side 1 and Side 2. Once your product is assembled, Side 1 becomes the exterior, while Side 2 becomes the interior. No matter how simple or complicated your product may be, this will always hold true.
Here are a few examples to help you visualize what your product looks like when it’s still in the two-sided stage.
Flat, unfolded products
- Postcard
- Business card
- Rack card
- Sell sheet
- Stepped inserts

No-pocket folded products
- File folder
- No-pocket folder/binder
- Bi-fold brochure
- Report cover
Folded products with flaps and frames
- Tri-fold brochure
- Photo holder
- Certificate folder
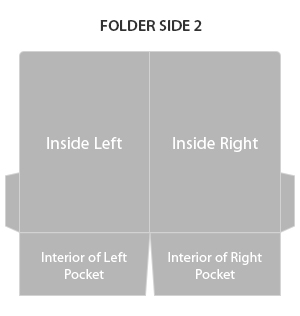
Folded products with pockets
- Presentation folder
- Document folder
- Regular binder

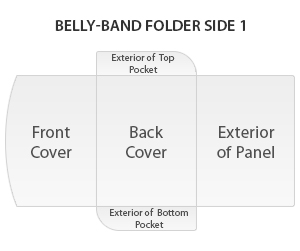
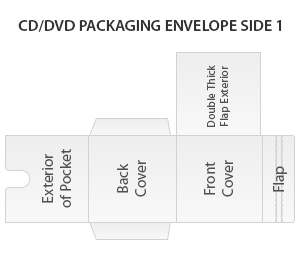
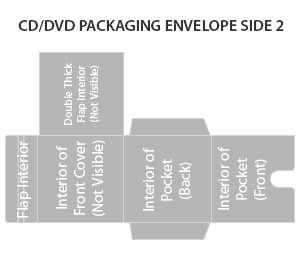
Folded products with flaps and pockets
- Belly-band folder
- CD/DVD packaging
- Portfolio

Special case: 3D presentation box


What imprint methods can I use?
Certain imprint methods work best on certain areas of a design—which is why printers allow more options for Side 1 than Side 2. On Side 1, any print method is viable. You can apply ink with four-color process (CMYK) or PMS printing, and you can add texture with foil stamping, embossing, or debossing. But on Side 2, you can only use CMYK or PMS printing.
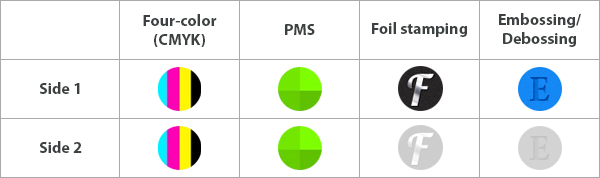
It sounds like a weird rule, especially when you want your marketing materials to have the same print method all over. But since Side 1 is the exterior of the product, it’s much more visible than Side 2. For aesthetics, it makes more sense to use the flashiest imprint method on the part of the design your audience will actually see.
From a technical standpoint, using a textured imprint method on the inside of a design can cause problems. For instance, if you emboss the inner left panel, the embossed pattern will show through as a backwards, debossed emblem on the front cover. That’s not exactly a clean, appealing look. Likewise, foil stamping and debossing can create unwanted indentations in other parts of the design. It’s best to apply those effects to Side 1, because the indentations on the interior will likely be covered up by other panels or by the papers people put in folders.
What coatings can I use?
Unlike imprint methods, any coating can be applied to Side 1 or Side 2. The catch is that to apply a coating, the stock itself has to be coated. It may sound a bit paradoxical, but an uncoated stock will actually absorb the outer coating, making it invisible.
To apply a coating, you’ll need to choose a stock that’s labeled C1S or C2S. A C1S stocked is “coated one side.” When constructing the product, the coated side almost always becomes Side 1, because you’ll most likely want the coating to enhance the design’s exterior. C1S stocks are a great choice if your product’s interior is mostly covered. If you want to coat your entire product or small areas on the interior of the design, you’ll need to select a C2S stock. C2S stands for “coated two sides,” meaning the coating is applied to both Side 1 and Side 2.
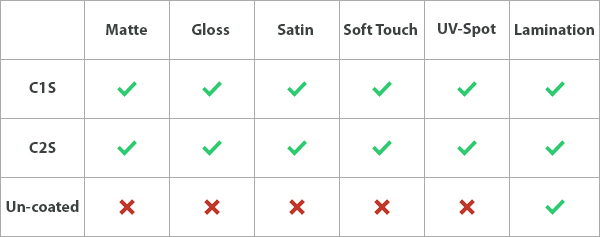
Besides adding to the look and texture of the design, coatings also provide protection. If you happen to want a stock that’s uncoated but still want to protect your design, lamination is the way to go. You’ll be able to cover both sides—so long as it’s not textured stock, because the roughness can ruin the lamination.
Ready to print
Now that you’re armed with a good understanding of Side 1 and Side 2, communicating with your printer will be a breeze. And once you decide what basic look and style you want, you’ll be able to select the best stock, imprint, and coating options for your design.
Of course, some projects are more complicated than others. Refer back to this guide as often as you need to, and be sure to download a print template for your product if it’s available. Print templates will help you visualize how your product looks before it’s assembled. Most importantly, remember to ask questions. Your printer’s job is to help you through the entire process, and they’re happy to answer any of your concerns.
Have a question about Side 1 and Side 2? Feel free to ask us below.


Thanks so much for this post! These diagrams are incredibly helpful for understanding what the options are, but also explaining to others what I want. I hate trying to draw or fold or (worst of all) tell people what kind of materials I have in mind. Folds and brochures can be unnecessarily complicated, so I really appreciate the straightforward nature of this article. Thanks!
These are really great. All diagrams are very helpful and informative. I really like the simplicity and information of this blog.
Thx.